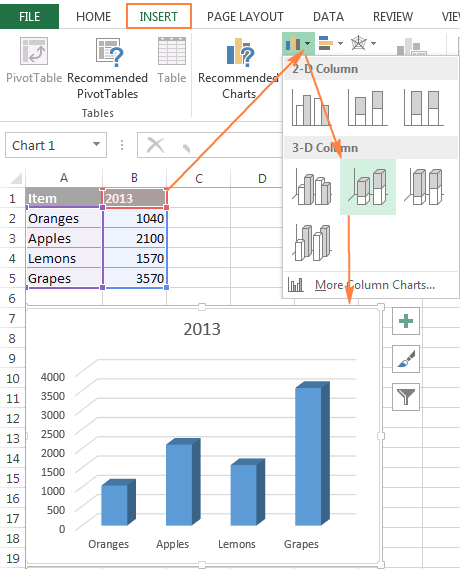
Rotating tables in Excel can be a valuable skill when you need to make text more readable or reorient your data for better visualization. Whether you are working in an organization or handling personal projects, mastering this technique is essential for efficient data manipulation. In this article, we’ll walk you through the step-by-step process of rotating a table in both clockwise and anti-clockwise directions, enabling you to create polished and organized spreadsheets that stand out from the crowd. What is Table Rotation in Excel? Table rotation, often referred to as “transposing” data, is a process in Excel where rows and columns are swapped. This means that data initially organized in rows will be transformed into columns, and data in columns will be converted into rows. The primary purpose of rotating a table is to alter its orientation to better suit the desired layout for data analysis, reporting, or presentation purposes. Why Should You Rotate a Table? Rotating a table in Excel offers several advantages. For instance, when dealing with datasets with numerous data points, transposing the table can enhance readability and make it easier to analyze trends or patterns. It can also be helpful when creating charts or graphs, as certain chart types may require data in a specific orientation to display accurately. Preparing Your Data Before starting the rotation process, ensure that your data is well-organized and free of any unnecessary rows or columns. Removing irrelevant information will streamline the rotation process and prevent errors. Rotating a Table in Excel: Step-by-Step Guide Step 1: Select the Table To begin, open your Excel workbook and select the table you wish to rotate. Once you have made the selection, copy the table by pressing “Ctrl + C” or right-clicking and choosing “Copy” from the context menu. Next, navigate to a blank cell where you want to paste the transposed table. Right-click again and select “Paste Special,” then choose the “Transpose” option. This action will transpose and rotate your table. Step 2: Create a Helper Column After performing the Transpose, you’ll need to create a helper column. Simply type a series of numbers in the next column adjacent to the transposed table. This step is essential for the subsequent sorting process, which ensures your data maintains its integrity during rotation. Step 3: Sort the Data Now that you have your helper column in place, it’s time to sort the data to achieve the desired rotation. Select the entire dataset, including the helper column, by clicking and dragging your cursor over the area. Alternatively, you can press “Ctrl + A” to select the entire sheet. With the data selected, navigate to the “Data” tab in the Excel ribbon and click on the “Sort” button. Step 4: Sort from Largest to Smallest The “Sort” dialog box will appear, allowing you to customize the sorting settings. Choose whether you want to sort in ascending or descending order based on your preference. For our table rotation purposes, select “Descending Order” or “Largest to Smallest” to achieve the desired effect. Once you’re satisfied with your selections, click “OK” to apply the sort. With this step completed, your table will rotate 90 degrees, providing you with the orientation you need for better readability and data analysis. Tips and Tricks for Efficient Table Rotation Utilize keyboard shortcuts to expedite the copy-paste process. Use Excel’s “Find and Replace” feature to quickly edit specific data points after rotation. Save your workbook periodically during the rotation process to prevent accidental loss of progress. Common Mistakes to Avoid Forgetting to include headers during data selection may lead to misinterpreted information after rotation. Failing to double-check the destination location may overwrite critical data. Not saving the workbook after rotation could result in losing all the changes made. Conclusion Rotating tables in Excel may seem like a simple task, but it can significantly enhance the visual appeal and functionality of your spreadsheets. By following the straightforward steps outlined in this comprehensive guide, you can easily rotate tables and present your data in a clear and organized manner. Whether you’re working on financial reports, sales data, or any other tabular information, mastering this technique will undoubtedly set you apart as an Excel power user. Remember to remove the helper column after the rotation to maintain data cleanliness. Now, go ahead and impress your colleagues or clients with your newfound skills in Excel table rotation. Happy rotating!

How to Add a Header Row in Excel: 4 Step-by-Step Methods

How to rotate or transpose Excel worksheet data

How to Rotate Text in Cells in Excel (Easy Steps)
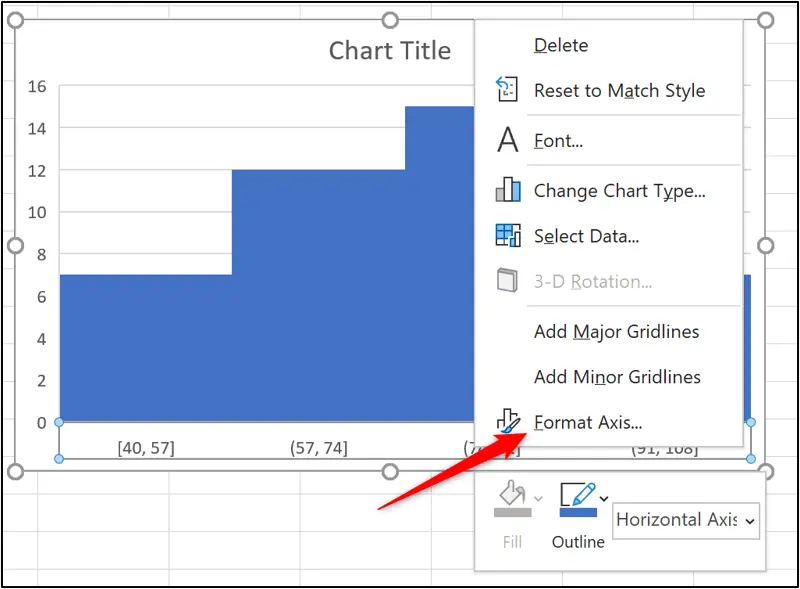
How to Create a Histogram in Excel [Step by Step Guide]
.png)
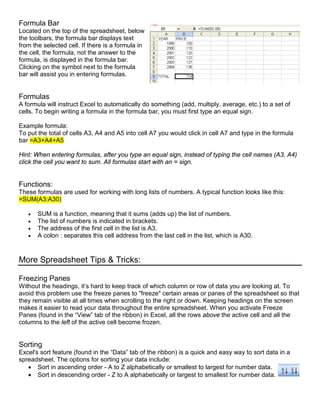
Creating Advanced Charts and Graphs in Excel - GeeksforGeeks

6 Methods to Copy Table from Excel to Word in 2024
NCompass Live: Excel for Librarians
cdn./_img-blog/excel-chart/create-firs
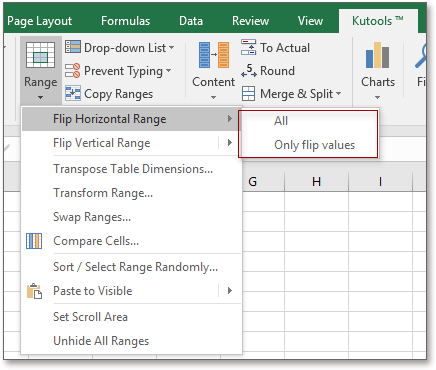
How to rotate table by 90 or 180 degrees in Excel?
How to rotate a table by 180 degrees with a formula in Excel - Quora

How to Rotate Text in Cells in Excel (Easy Steps)

How to Rotate a Table in Excel: A Step-by-Step Guide - Earn & Excel

Enter rotating shifts from a start date in Excel

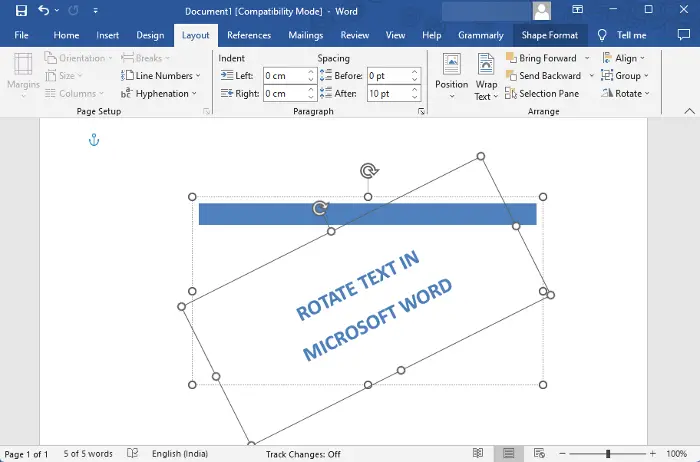
How to rotate tables in word